Essential Beekeeping Equipment for Your First Year: A Complete Checklist
Starting your journey as a beekeeper is an exciting adventure, but it can also feel overwhelming. One of the first hurdles is figuring out exactly what equipment you need. With so many options available, it's easy to get confused and overspend. This comprehensive checklist will guide you through the essential beekeeping equipment for your first year, helping you prioritize your purchases and make informed decisions. We'll cover everything from the hive itself to protective gear, tools, and more. We'll also explore different hive types, offer cost estimates, recommend brands, and even share tips on how to save money, including the innovative world of 3D printed beekeeping equipment [blocked].
Why the Right Equipment Matters
Investing in the right beekeeping equipment from the start is crucial for several reasons. First and foremost, it ensures your safety and the well-being of your bees. Proper protective gear will give you the confidence to work your hives without fear of stings, while a well-constructed hive will provide a safe and healthy environment for your colony to thrive. The right tools will make your hive inspections more efficient and less intrusive for the bees. In short, starting with the right gear sets you up for a successful and enjoyable beekeeping experience. For a more general overview of beekeeping, check out our Complete Beginner's Guide to Beekeeping [blocked].
Must-Have Equipment: The Bare Essentials
When you're just starting, it's important to focus on the essential items you'll need to get your first colony up and running. Here's a breakdown of the must-have beekeeping equipment:
The Hive: Your Bees' Home
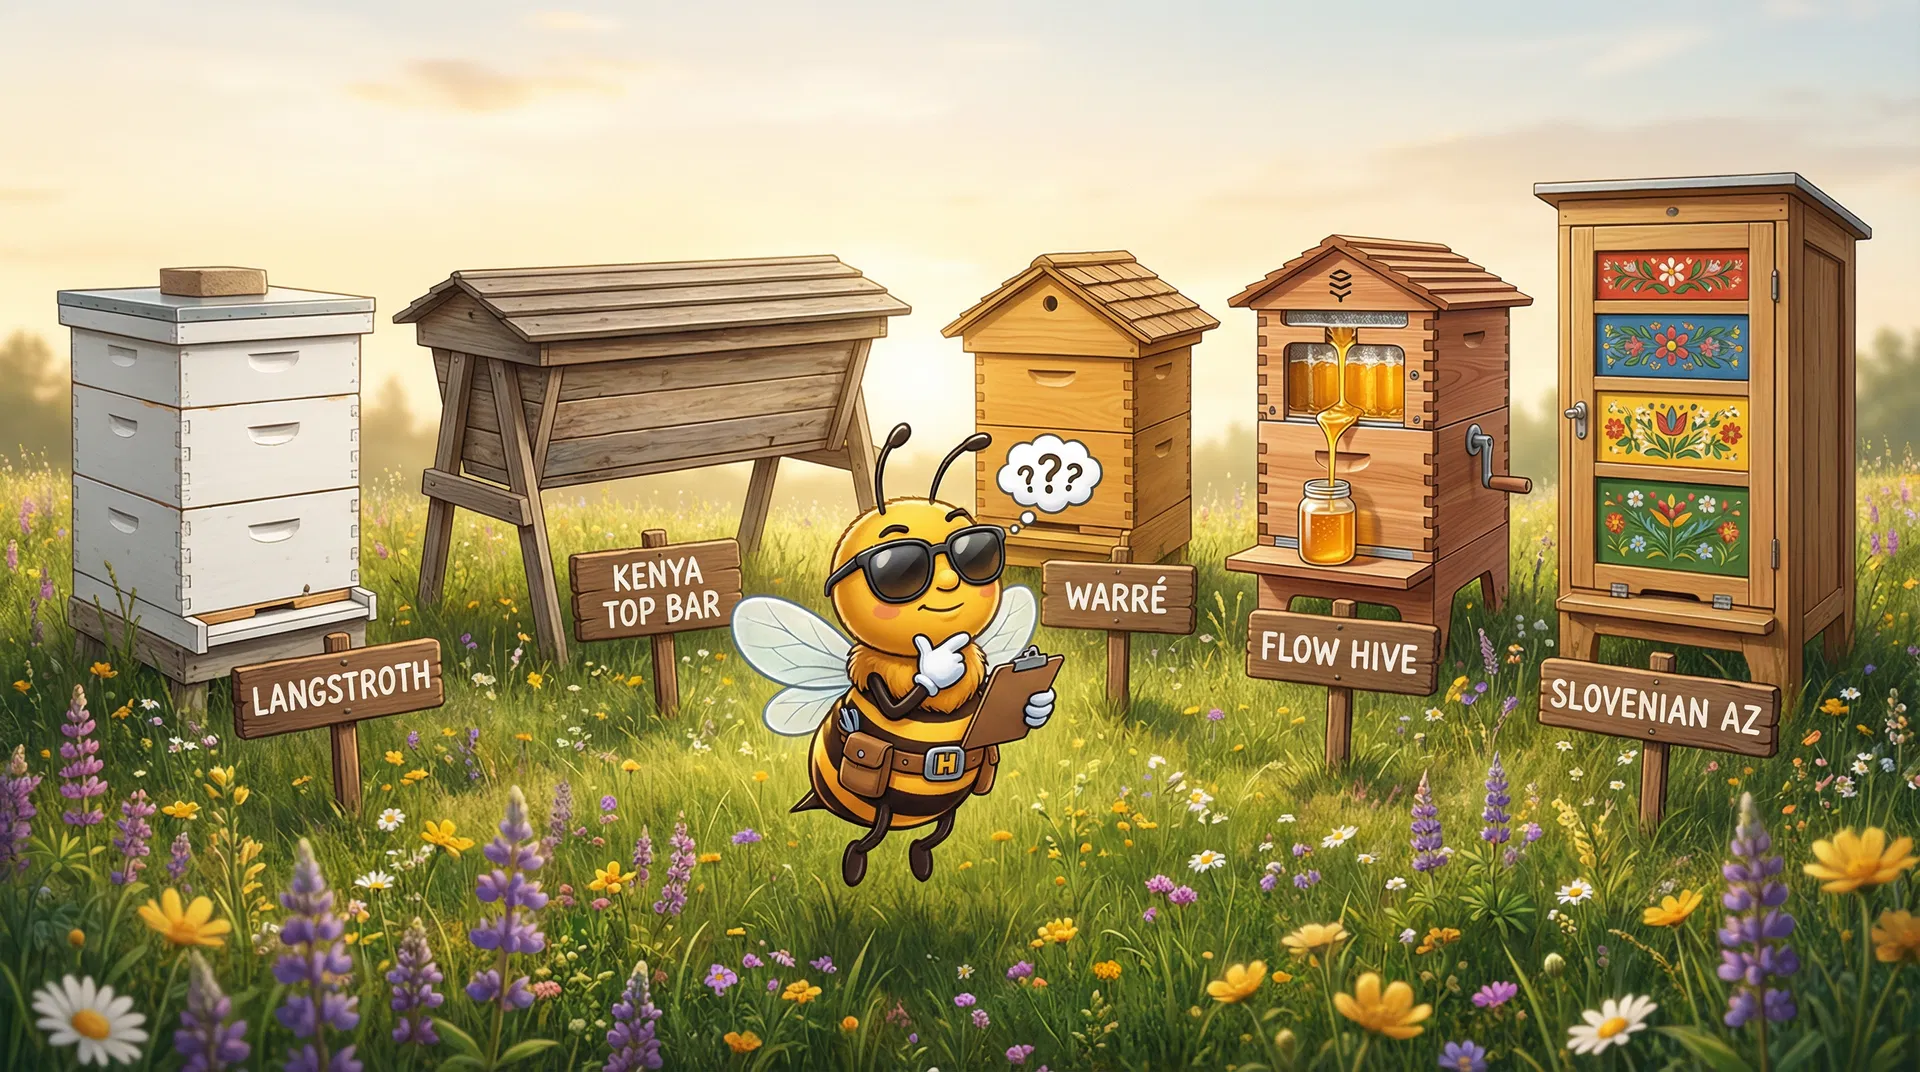
The hive is the heart of your beekeeping operation. It's where your bees will live, raise their young, and store honey. There are several different types of hives to choose from, each with its own advantages and disadvantages. The three most popular options for beginner beekeepers are the Langstroth, Top Bar, and Warré hives.
| Hive Type | Pros | Cons | Estimated Cost (for a complete setup) |
|---|---|---|---|
| Langstroth | Highly standardized and widely available, easy to inspect and manage, expandable, large honey production. | Can be heavy to lift, requires more equipment (frames, foundation), more intrusive for the bees. | $150 - $300 |
| Top Bar | More natural for the bees, less heavy to lift, less expensive to start, less intrusive inspections. | Lower honey yield, more difficult to inspect, not standardized. | $100 - $250 |
| Warré | Designed to mimic a natural bee colony in a hollow tree, less intrusive, more natural for the bees. | Lower honey yield, more difficult to inspect and manage, not as widely available. | $150 - $300 |
For most beginners in North America, the Langstroth hive is the recommended choice due to its standardization and the wealth of information available. It consists of a bottom board, a series of boxes (brood box and honey supers), frames with foundation, an inner cover, and an outer cover.
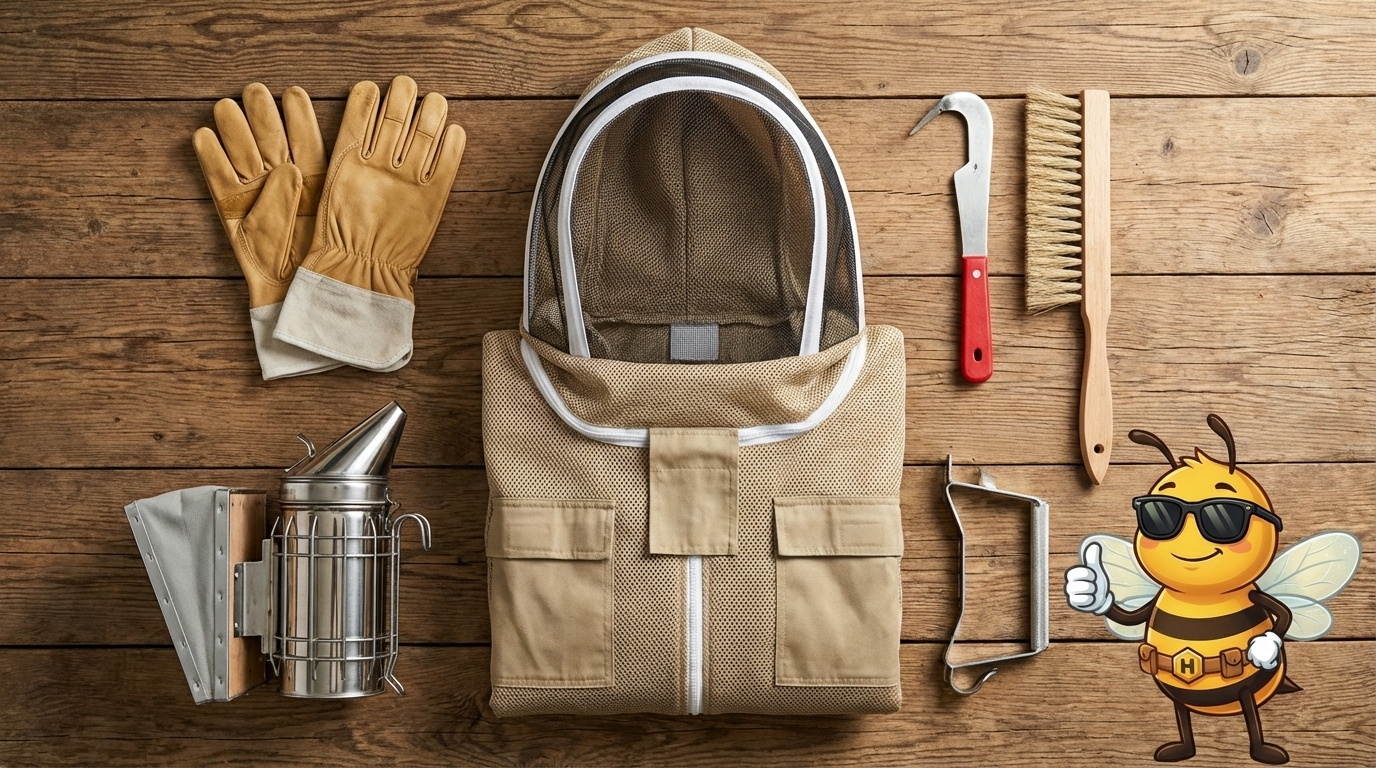
Protective Gear: Your Beekeeper's Armor
Working with bees means you will get stung at some point. However, proper protective gear can significantly reduce the number of stings you receive, making your beekeeping experience much more pleasant. Here's what you'll need:
- Beekeeping Suit or Jacket: A full suit provides the most protection, but a jacket with a veil is often sufficient for beginners. Look for light-colored, thick fabric that bees are less likely to sting through.
- Veil: The veil protects your face and neck. It's essential to choose a veil that offers good visibility.
- Gloves: Beekeeping gloves protect your hands from stings. Leather gloves offer the most protection but can be bulky. Nitrile or goat skin gloves offer a better feel and dexterity.
- Boots: A pair of sturdy, light-colored boots will protect your feet and ankles.
Essential Tools: Your Beekeeping Sidekicks
In addition to your hive and protective gear, you'll need a few essential tools to work your bees:
- Hive Tool: This is your most important tool. It's a mini crowbar that you'll use to pry open the hive, separate frames, and scrape off propolis (a resinous mixture that bees use to seal gaps in the hive).
- Smoker: A smoker is used to calm the bees before you open the hive. The smoke masks the alarm pheromone that bees release when they feel threatened, making them less likely to sting.
- Bee Brush: A bee brush is used to gently brush bees off frames during inspections.
Feeding Equipment: Giving Your Bees a Boost
There will be times when you need to feed your bees, especially when you're starting a new colony or during a nectar dearth. There are several types of feeders available:
- Entrance Feeder: This is the simplest type of feeder, but it can encourage robbing from other hives.
- Top Feeder: A top feeder sits on top of the hive and can hold a large amount of syrup.
- Frame Feeder: A frame feeder takes the place of a frame inside the hive.
Nice-to-Have Equipment: Making Your Life Easier
Once you have the essential equipment, there are a few other items that can make your beekeeping journey a little easier and more enjoyable:
Honey Extraction Equipment
If you're hoping to harvest your own honey, you'll need some extraction equipment. While you can use the crush and strain method to extract honey without any special equipment, an extractor will make the process much cleaner and more efficient.
- Extractor: An extractor is a machine that uses centrifugal force to spin the honey out of the frames.
- Uncapping Knife or Scratcher: You'll need a way to remove the wax cappings from the honeycomb before you can extract the honey.
- Strainer or Filter: A strainer or filter is used to remove any wax or debris from the honey after it's been extracted.
Other Helpful Gear
- Frame Grip: A frame grip is a tool that helps you lift frames out of the hive.
- Frame Perch: A frame perch is a handy tool that attaches to the side of the hive and gives you a place to rest frames during inspections.
- Queen Catcher and Marker: A queen catcher and marker can be helpful for finding and marking your queen. This makes it easier to spot her during inspections.
Where to Get Your Gear: Buying New, Used, or DIY
There are several places to get your beekeeping equipment. You can buy new from a beekeeping supply company, look for used equipment, or even build some of your own.
Brand Recommendations:
- Mann Lake: A popular and reputable supplier of beekeeping equipment.
- Dadant & Sons: Another well-known and respected beekeeping supply company.
- Betterbee: A great source for high-quality beekeeping equipment and supplies.
Tips for Saving Money:
- Buy a starter kit: Many beekeeping supply companies offer starter kits that include all the essential equipment at a discounted price.
- Look for used equipment: You can often find used equipment for sale on Craigslist or in local beekeeping groups. Just be sure to properly clean and sterilize any used equipment to prevent the spread of disease.
- Build your own: If you're handy, you can save money by building some of your own equipment, such as the hive bodies and frames.
The 3D Printing Option:
For the tech-savvy beekeeper, 3D printing offers an exciting new way to create custom beekeeping equipment. From queen excluders to entrance reducers, the possibilities are endless. To learn more about this innovative approach, check out our article on 3D Printed Beekeeping Equipment [blocked].
A Deeper Dive into Hives
As a new beekeeper, choosing the right hive is one of the most important decisions you'll make. Let's take a closer look at the three most popular hive types to help you make an informed choice.
The Langstroth Hive: The Modern Standard
The Langstroth hive is the most common hive type used in the United States and many other parts of the world. Patented in 1852 by Reverend Lorenzo Langstroth, this hive's design is based on the concept of "bee space" – the precise gap of 1/4 to 3/8 inch that bees naturally leave between their combs. By maintaining this space, Langstroth's design allows beekeepers to easily remove and inspect frames without angering the bees or destroying their comb.
A standard Langstroth hive consists of:
- Hive Stand: Elevates the hive off the ground to protect it from moisture and pests.
- Bottom Board: The floor of the hive. It can be solid or screened. Screened bottom boards provide better ventilation and are useful for monitoring varroa mite populations.
- Entrance Reducer: A small piece of wood that can be used to reduce the size of the hive entrance, protecting the colony from robbers and cold weather.
- Brood Box: The lower deep box where the queen lays her eggs and the colony raises its young.
- Honey Supers: Smaller boxes that are placed on top of the brood box for the bees to store honey.
- Frames and Foundation: Wooden or plastic frames that hold the foundation, a sheet of wax or plastic with a honeycomb pattern embossed on it. The foundation provides a guide for the bees to build their comb.
- Inner Cover: A flat cover that sits on top of the uppermost honey super, providing an insulating air space and preventing the bees from gluing the outer cover to the hive.
- Outer Cover: The roof of the hive, which protects it from the elements.
The Top Bar Hive: A More Natural Approach
The Top Bar hive is a single-story hive that is longer and shallower than a Langstroth hive. Instead of frames, the bees build their comb on wooden bars that are laid across the top of the hive. This design is thought to be more natural for the bees, as it allows them to build their comb to whatever size and shape they choose.
Top Bar hives are a good choice for beekeepers who are interested in a more hands-off approach to beekeeping. They are also a good option for beekeepers who have difficulty lifting heavy boxes, as the individual bars are much lighter than a full honey super.
The Warré Hive: The Vertical Top Bar
The Warré hive, designed by French beekeeper Émile Warré, is another type of hive that is designed to mimic the natural environment of bees. It is essentially a vertical Top Bar hive, consisting of a stack of identical boxes. As the colony grows, new boxes are added to the bottom of the hive, rather than the top. This encourages the bees to build their comb downwards, as they would in a hollow tree.
Warré hives are a good choice for beekeepers who are interested in a very natural and low-intervention approach to beekeeping. However, they can be more difficult to manage than Langstroth or Top Bar hives, and they are not as widely available.
Protective Gear in Detail
Your protective gear is your first line of defense against bee stings. Here's a more detailed look at what to look for when choosing your beekeeping armor.
- Suits and Jackets: Look for suits and jackets made from a thick, light-colored material like cotton or canvas. Ventilated suits are a great option for beekeepers in hot climates. Make sure the zippers are high-quality and that there are overlapping closures to prevent bees from getting in.
- Veils: There are three main types of veils: round, square, and fencing. Round veils offer the best visibility, but they can be more easily blown against your face. Square veils offer more protection but can be more cumbersome. Fencing veils are a good compromise, offering good visibility and protection.
- Gloves: Leather gloves offer the most protection, but they can make it difficult to feel what you're doing. Goatskin gloves are a good alternative, offering a good balance of protection and dexterity. Nitrile gloves are a good option for beekeepers who are allergic to leather or who want a more disposable option.
- Boots: A pair of light-colored, ankle-high boots is a good choice for beekeepers. Avoid wearing dark-colored or fuzzy boots, as these can attract bees.
Essential Tools Explained
Your beekeeping tools will make your hive inspections much easier and more efficient. Here's a closer look at the three essential tools for every beekeeper.
- Hive Tool: The standard hive tool is a simple, flat bar with a bent end for scraping. The J-hook hive tool has a J-shaped hook on one end that is useful for prying frames out of the hive.
- Smoker: When lighting your smoker, use a fuel that will produce a cool, white smoke. Good fuel options include pine needles, cotton, and burlap. To use the smoker, puff a small amount of smoke into the hive entrance and then a few puffs under the inner cover before you open the hive.
- Bee Brush: When using a bee brush, be gentle. You don't want to crush any bees. A quick, flicking motion is all that is needed to remove bees from a frame.
Pest and Disease Management
While not exactly equipment, having a plan and the necessary supplies for pest and disease management is a critical part of beekeeping. The Varroa mite is the single most serious threat to honey bees today. You should have a plan for monitoring and treating for Varroa mites before you even get your bees. For a deep dive into this topic, our Varroa Mite Treatment Complete Guide [blocked] is an essential read.
Choosing Your Bees
Once you have your equipment, you'll need to decide what kind of bees to get. There are several different races of honey bees to choose from, each with its own unique characteristics.
- Italian Bees: Italian bees are the most popular race of honey bees in North America. They are known for their gentle nature, excellent honey production, and prolific brood rearing.
- Carniolan Bees: Carniolan bees are another popular choice for backyard beekeepers. They are known for their gentle nature, rapid spring buildup, and overwintering ability.
- Russian Bees: Russian bees are a good choice for beekeepers in cold climates. They are known for their resistance to varroa mites and their ability to overwinter in small clusters.
Setting up Your Apiary
Once you have your bees and equipment, you'll need to decide where to set up your apiary. Here are a few things to consider when choosing a location for your hives:
- Sunlight: Your hives should be located in an area that receives at least six hours of direct sunlight per day.
- Water: Your bees will need a source of water, so it's a good idea to place your hives near a pond, stream, or birdbath.
- Windbreak: A windbreak, such as a row of trees or a fence, will help to protect your hives from the wind.
- Accessibility: You'll need to be able to access your hives easily, so make sure they are located in an area that is easy to get to.
Common Beginner Mistakes to Avoid
Every new beekeeper makes mistakes. It's part of the learning process. But by being aware of the most common pitfalls, you can avoid some of the most costly and discouraging errors.
- Starting with too many hives: It's tempting to start with several hives, but it's best to start with just one or two. This will allow you to learn the ropes without being overwhelmed.
- Not inspecting your hives enough: Regular hive inspections are essential for monitoring the health of your colony and catching problems early. Aim to inspect your hives every 7-10 days during the spring and summer.
- Not feeding your bees when they need it: A new colony needs a lot of food to get established. Be sure to feed your bees a 1:1 sugar water solution in the spring and fall, and a 2:1 solution in the winter.
- Not managing for varroa mites: Varroa mites are a serious threat to honey bees. Be sure to have a plan for monitoring and treating for varroa mites before you even get your bees.
- Harvesting too much honey: It's important to leave enough honey for the bees to survive the winter. A good rule of thumb is to leave at least 60 pounds of honey for a colony in a cold climate.
Beekeeping Throughout the Seasons: A Yearly Calendar
Beekeeping is a year-round activity, with different tasks and priorities depending on the season. Here's a general overview of what to expect throughout the year:
- Spring: This is the busiest time of year for beekeepers. The colony is rapidly expanding, and you'll need to be on the lookout for swarming. You'll also be adding honey supers and performing regular hive inspections.
- Summer: The main focus of the summer is honey production. You'll be monitoring the honey flow and adding or removing honey supers as needed.
- Fall: As the weather cools down, the colony will begin to prepare for winter. You'll be harvesting the last of the honey and making sure the bees have enough food to survive the winter.
- Winter: In most climates, the bees will be clustered inside the hive for the winter. Your main job is to make sure the hive is protected from the elements and that the bees have enough food.
Conclusion: Your Beekeeping Journey Begins
Starting your beekeeping journey is an exciting and rewarding experience. By investing in the right equipment from the start, you'll be well on your way to becoming a successful beekeeper. Remember to start with the essentials and then add to your collection as you gain more experience. For more in-depth guidance on hive inspections, be sure to read our Hive Inspection Checklist for Beginners [blocked].
Ready to take the next step? Join our vibrant community of beekeepers at the Modern Beekeeping Skool. You'll find a supportive community, expert advice, and a wealth of resources to help you on your beekeeping journey. We can't wait to see you there!